

Recording Lectures in Class Without Breaking Trust

You're in the middle of the semester scramble. A lecturer clicks record, students settle in, and everyone assumes the file will just be there later, clean and usable. Then a parent asks who can see it, a student says their question appears in the archive, and someone in academic affairs wants to know whether the clip attached to a complaint is the same file that was captured in class.
That's the core problem with recording lectures in class. It isn't only about microphones and storage. It's about trust, access, and whether the recording still means what people think it means months later. Universities have been doing this for decades, long before hybrid teaching made it feel normal. The University of Geneva was recording many lectures on audiotape in the 1970s, and by 2004 its library catalogues referenced about 7,000 lecture audiotapes that usually ran 60 to 90 minutes Educause reference. That history matters because it shows lecture recording started as an archival and access practice, not a trendy classroom gadget.
Today, the pressures are considerable. The same file that helps a missed student catch up can also expose voices, faces, comments, and the classroom's side conversations. If you want a useful framing for the whole subject, the best version of recording is the one that behaves like evidence from the first frame, not a loose video file you hope nobody questions later. A good overview of the broader trust-and-safety mindset is worth reading alongside classroom policy work, especially if your institution is already thinking about verification and reuse in the same breath as access controls. trust-and-safety guidance
Why Lecture Recording Has Become a Trust Problem
A lecture recording starts as a simple classroom convenience. The problem is that it does not stay simple for long.
Once a class is recorded, the file can carry more than instruction. It can preserve a student question asked in confidence, a throwaway comment that later causes trouble, or a clip that gets replayed in the wrong context. That is why recording lectures in class has become a trust problem, not just a technical one. A good overview of the broader trust-and-safety mindset belongs in the same conversation as classroom policy, because the file needs rules as much as it needs storage.
The original purpose still matters. Lecture recording was built to help absent students, support review, and make material easier to revisit. That archival purpose still holds, and it should be written into policy documents so the reason for recording survives staff turnover.
The file is not just a convenience item
If no one assigns ownership, access, and retention rules, the recording turns into a file with no steward. One person assumes IT owns it. Another assumes the instructor does. A third assumes the LMS folder counts as policy.
Treat the recording as a managed record the moment the red light turns on.
That approach forces the right questions early. Who can view the file, who can download it, and who decides whether a clip is authentic? Those are routine questions now, not edge cases. They come with the territory once a roomful of people has been captured on audio or video.
There is also a plain media lesson here. If your institution wants people to trust recorded teaching, the capture workflow has to be disciplined from the start. A partner guide on produce educational videos that convert is useful for creators, but a classroom recording has a different job. It has to respect students as participants, not just as an audience, and it has to do that without turning consent, retention, and verification into afterthoughts.
Choosing Equipment and Settings That Survive a Real Classroom
Forget the gear fetish. Most classroom recordings fail because of predictable, boring mistakes, not because the camera wasn't expensive enough. If you get the microphone right, the rest gets much easier.
Start with the microphone, not the camera
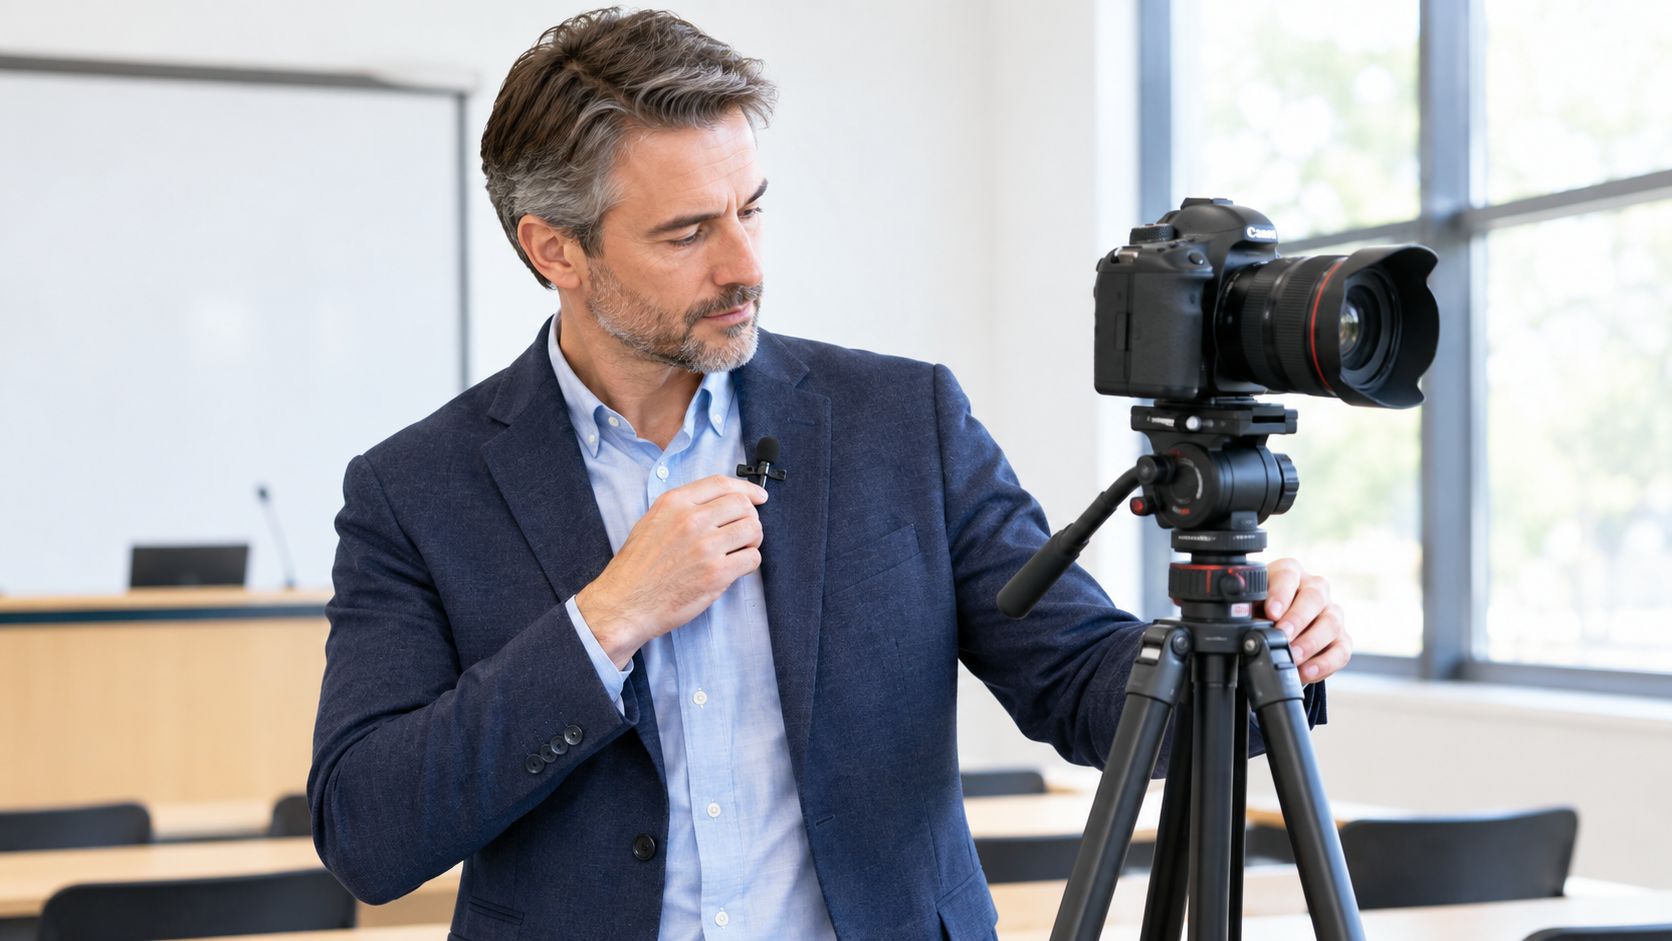
A lapel mic clipped at chest height is usually the most practical choice for a speaking lecturer. It keeps the voice closer to the source and avoids the hollow sound you get when a ceiling mic has to fight room noise, HVAC hum, and students shifting in seats. Soft clothing can ruin a lapel setup if the mic rubs against fabric, so clip it firmly and test it before anyone else enters the room.
For the audio file itself, use 44.1 kHz or 48 kHz sample rate. That won't make bad speech sound magical, but it gives you a sensible foundation for speech capture and later editing. For video, 720p or 1080p is enough for lecture use in most rooms. Don't chase ultra-high resolution if your audience mainly needs clear speech and readable slides.
A wide camera above the whiteboard works if the room is well lit and the instructor stays near the front. If the camera sees the lecturer but the slide deck is washed out, the recording has already failed for student review. Bright, even lighting matters more than many viewers expect.
If you want a quick comparison of student-recording tools and practical tradeoffs, voice recorder options for lectures is a helpful reference point.
Keep one backup path alive
Use a second audio source if the class matters. A phone in a pocket, on airplane mode, recording as a backup can save the day when the primary device crashes or a cable comes loose. That's not glamorous, but it's the difference between a usable archive and an apology email.
A classroom recording setup should survive a tired Tuesday, not just a demo in an empty room.
Print this before your vendor meeting:
- Microphone: lapel or dependable wireless, not ceiling-only in a noisy room.
- Audio settings: 44.1 kHz or 48 kHz.
- Video quality: 720p or 1080p.
- Lighting: even enough that faces and slides are readable.
- Backup: one extra audio path, ideally a phone or second recorder.
- Placement: test the room with the lecturer standing, turning, and writing on the board.
Running the Capture From the First Minute to the Last
A good recording session is a short routine, not a heroic act. If people are improvising every week, the file will eventually become a mess. Give the class a repeatable run-of-show and the whole process stops feeling fragile.
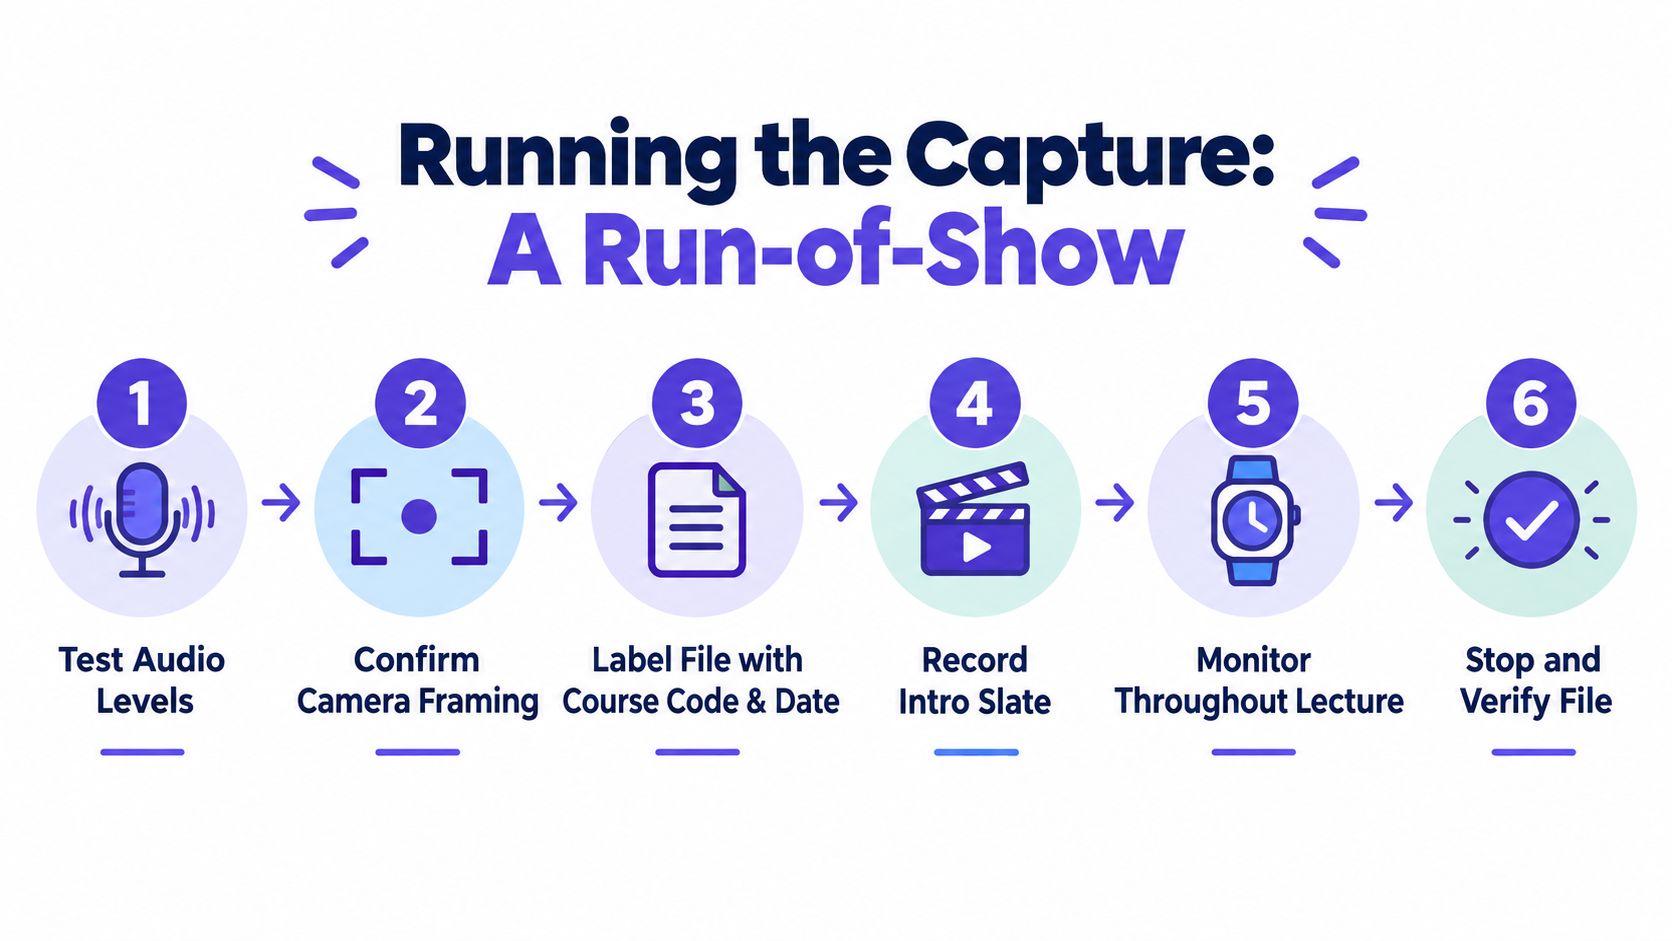
Before class, do the same five things every time
Start by checking sound levels. Speak at a normal classroom volume and make sure the mic isn't peaking or whisper-quiet. Then confirm the framing, because a perfect voice track won't help if the lecturer walks out of shot during the explanation everyone needed.
Label the file immediately with the course code and date. That sounds mundane until you have ten anonymous videos called “lecture final new 2.” Start the backup recorder, if you have one, before students arrive. Then record a short slate or spoken intro so anyone reviewing the file later knows the session was captured on purpose.
If you're building a campus workflow, tools that support lecture note capture and replay should fit into the same routine, not replace it. For students who rely on dictation for note-taking, Voice Control Pro for students is a useful example of how capture habits and accessibility needs can live in the same ecosystem.
During class, protect the flow
Repeat student questions before answering them. That gives the recording context and saves the editor from guessing what was asked. Don't pause mid-sentence while clicking through slides if you can avoid it, because those awkward gaps make the recording harder to follow later.
If you must pause the recording for a side conversation, say so out loud. A simple “I'm pausing the recording for a private matter” is enough. It creates a clear marker for anyone reviewing the file and reduces confusion if the session is later used for support or dispute resolution.
After class, close the loop immediately
Stop both recordings, verify they play, and move them into the right folder before the next class starts. That step is where most mixed-up-name mistakes disappear. If the file won't open now, it probably won't magically fix itself later.
Picking the Right File Format Without Drowning in Specs
Classroom recording fails fastest at playback. A file that looks fine on the lecturer's laptop means little if it won't open in the LMS, stutters on a phone, or balloons storage for no good reason. Choose for compatibility first, then quality.
Use the format your audience can actually open
MP4 is the safest default for lecture delivery because it plays across most devices and learning platforms. MOV fits Apple-heavy editing workflows, but it can be awkward once files need to move between systems. MKV is flexible and resilient for local storage, yet it is not the easiest choice for broad student playback. WebM can work well online, but I would not lead with it if your audience uses mixed devices and older workflows.
For most talking-head lectures, 1080p at 4 to 6 Mbps is a sensible target. It keeps the picture readable without producing bloated files. If the recording is mostly slides with a speaker window, 720p is often enough, especially when storage space and upload time matter more than visual polish.
Match the file to the use case
| Scenario | Format | Resolution | Approx. size per hour |
|---|---|---|---|
| Short recap clip | MP4 | 720p | roughly 1.5-2.5 GB per hour at 4 Mbps |
| Standard lecture recording | MP4 | 1080p | roughly 2.5-3 GB per hour at 6 Mbps |
| Slide-heavy session with small speaker window | MP4 or WebM | 720p | roughly 1.5-2.5 GB per hour at 4 Mbps |
| Editing master copy | MOV or MKV | 1080p | roughly 2.5-3 GB per hour at 6 Mbps |
Keep the table simple. Choose a file that students can watch and staff can manage, not one that wins a spec sheet contest. If your institution already uses screen-capture tools for snippets and demos, Snagit alternatives for Australian teams is a useful comparison point for classroom-friendly exports.
Don't overbuild the file if audio matters most
Some lectures live or die on speech, not motion. In those cases, an audio-only archive is often the better choice. It is easier to store, easier to search, and less tempting to share as if it were polished public video. For many classes, that is the smarter trade.
For teams that want the technical side laid out clearly, video codec analysis explains how container and codec choices affect playback.
A clean, readable file beats a “professional” export that nobody can open on deadline.
Handling Consent, Student Privacy, and Participation Fairly
A lecture recording that ignores consent becomes a liability fast. The goal is to record the class without turning student presence into permanent media.
Give students a way to participate without being captured
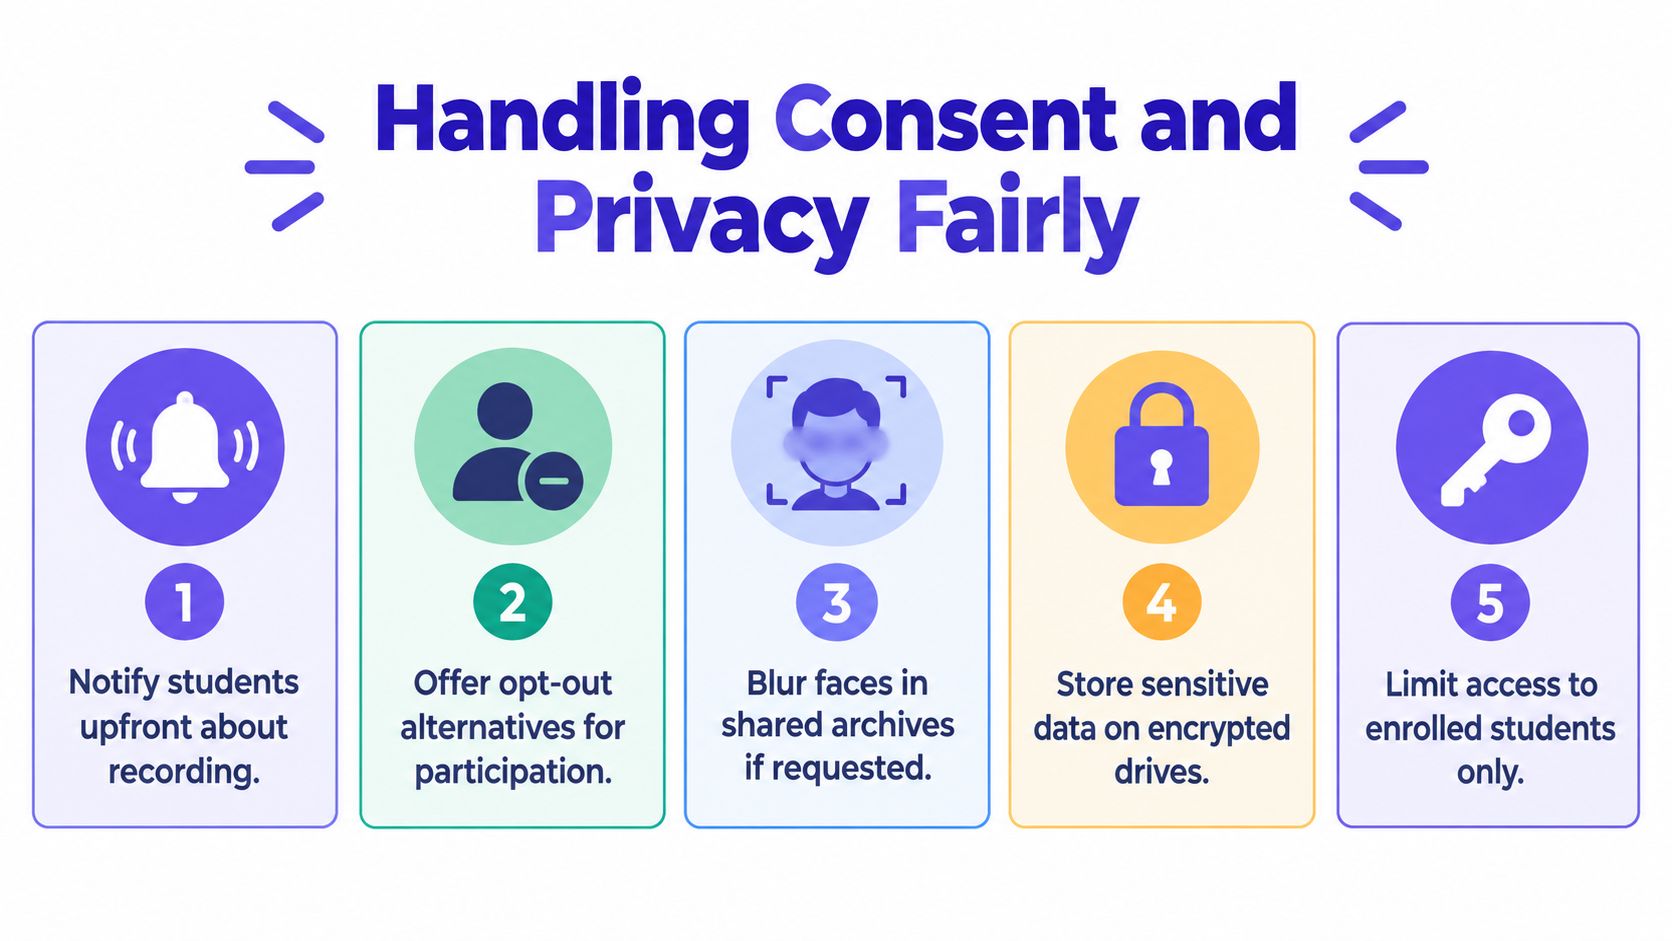
Some students do not want their voice, image, or home environment recorded. Design the class so they can still take part. Let them keep cameras and microphones off when the activity allows it. Let them ask questions through chat or email. Give them equivalent notes or transcripts when the recording is used for study support.
That approach is more honest than pretending a generic notice solves the problem. It also fits the way blended classes work, where participation and access have to coexist. Make participation possible without turning every student into permanent media.
Reuse demands cleanup, not wishful thinking
If a file will be reused beyond the current class, clean it first. Student comments may need to come out. Faces may need to be blurred. Voices may need to be distorted. Names should not stay in frame just because editing takes time.
William & Mary's recording guidance treats re-use as the point where anonymization becomes necessary or written consent becomes the safer path. Edinburgh's policy is stricter about personal study use, which shows that some institutions draw a hard line between a class-local recording and a shared archive. Those are policy calls, but they are also editing calls on the ground.
Use a simple decision tree
- If the recording is for enrolled students only, keep access restricted and say so clearly.
- If student questions or names appear, remove or mask them before any wider reuse.
- If the class includes disability accommodations, preserve equivalent access without forcing public sharing.
- If the file may be used later in a complaint or review, keep a cleaner original and a separate shared version.
The hard truth is that a recording can be useful and risky at the same time. A good classroom policy makes participation possible without turning every student into permanent media.
Storing and Sharing Recordings Safely
Storage is not a filing decision. It's a security decision. If you treat every recording like a temporary desktop file, you'll eventually lose track of who has it, where it's copied, and how long it's been sitting around.
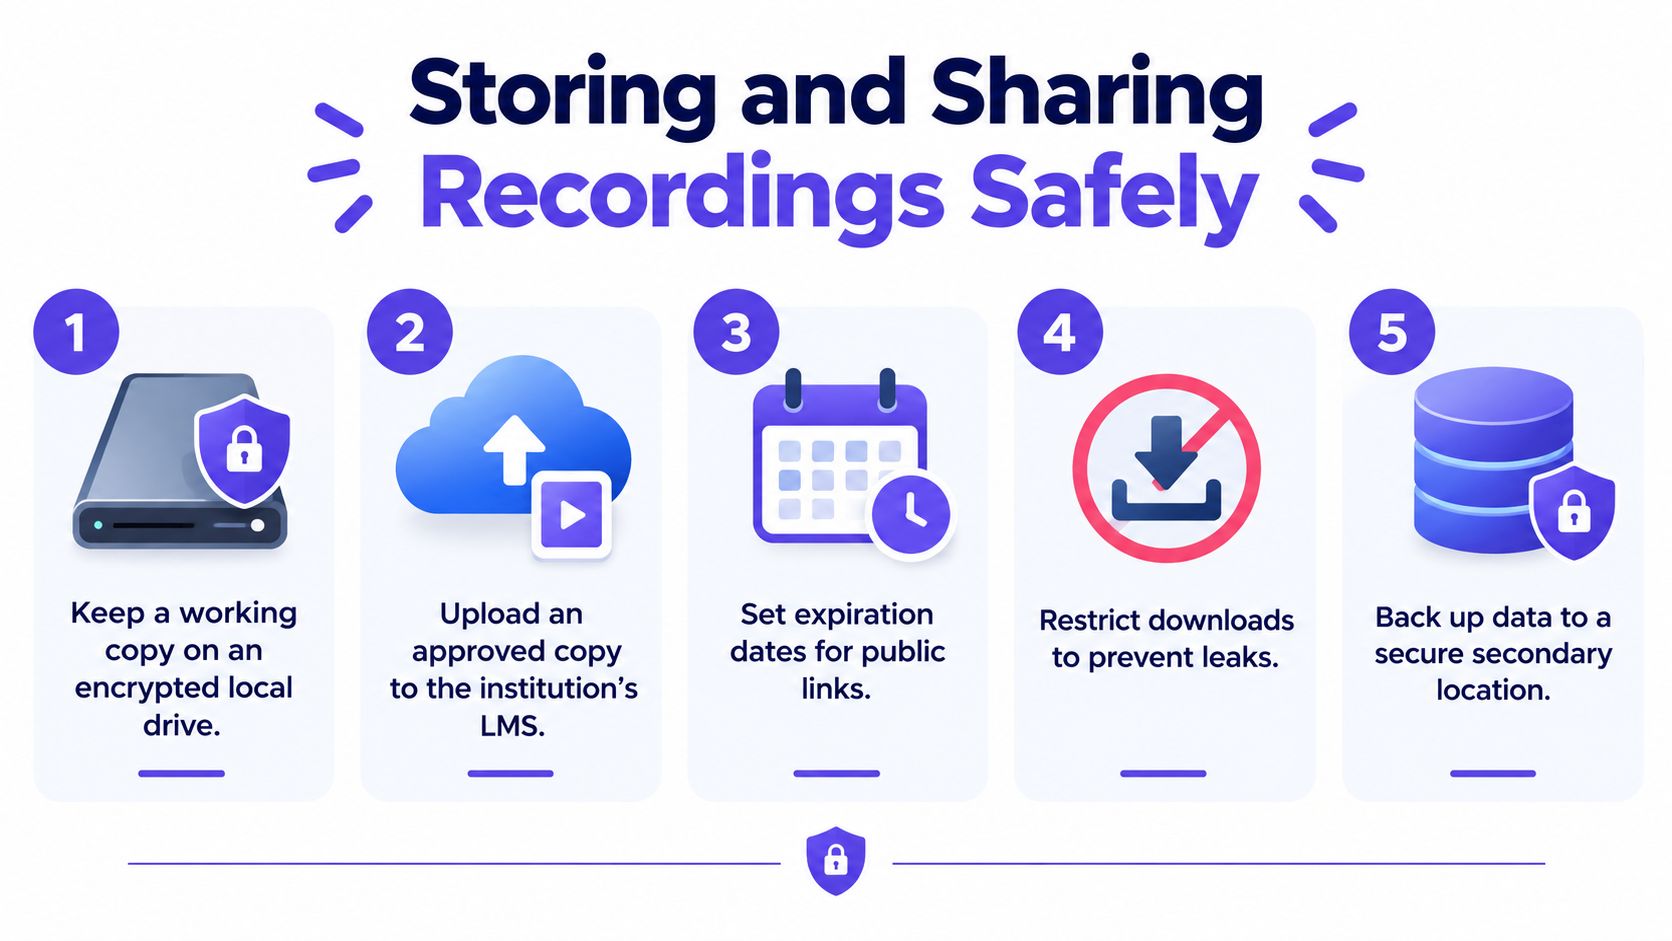
Use a three-layer storage habit
Keep a working copy on an encrypted local drive first. That protects you when you're cleaning the file up or checking whether it plays. Upload the approved version to the institution's LMS with role-based access, so only the right students and staff can see it. Then assign a clear retention date so the file doesn't linger forever in a forgotten folder.
That sequence matters because classroom videos tend to multiply. One copy turns into three, then six, then nobody knows which one was the approved version. The fix is boring but effective: one working copy, one shared copy, one deadline.
Control what leaves the system
Before upload, remove anything that shouldn't travel with the file. If the recording includes student questions, slide notes with private data, or a visible whiteboard containing names, clean that up first. Disable public sharing links unless there is a specific reason to allow them, and don't let download permissions default to everyone.
If someone later asks who accessed the recording, you want a log or at least a platform record that answers the question. That's the difference between a managed archive and a mystery box. Captions and transcripts help here too, because searchable text often reduces the need to hand around the raw video.
If the transcript is good, the video doesn't need to be everywhere.
Build a storage checklist you can actually use
- Working file: encrypted local drive, not a random desktop folder.
- Approved copy: LMS or institution-approved storage with access controls.
- Sharing: no public link unless policy explicitly allows it.
- Retention: set an end date before the semester gets busy.
- Audit trail: keep enough access history to answer later questions.
The goal is not to hoard recordings. The goal is to keep them useful without turning your drive into a liability drawer. For a product team thinking about authenticity alongside storage, the platform's own AI video verification approach is relevant only at the end of the workflow, after the file is already controlled and labeled.
Verifying That a Lecture Recording Is Still the Original
A recording sitting on a server is not automatically the original. That sounds obvious, but it is where institutional trouble starts. Files get re-encoded for mobile playback, trimmed for length, or lightly edited by well-meaning staff, and later someone asks whether the clip used in a dispute is still the same one that came out of the classroom.
Assume drift unless you can prove otherwise
A lecture recording can change without anyone noticing. A dead air trim may seem harmless. A slide export may replace the original image. A copied file may lose useful metadata. None of that is dramatic on its own, but it becomes a problem when the recording is used as evidence in an integrity case, an accessibility review, or a legal question about what was said.
Protect the original like an original. Preserve metadata. Create a checksum at capture time. Keep a plain change log if anyone edits the file. If the institution ever needs to show chain of custody, those habits make the story legible.
Use a quick authenticity pass before reuse
A privacy-first verifier can help before a file leaves the classroom workflow. AI Video Detector, for example, analyzes uploaded video for frame-level artifacts, audio forensics, temporal consistency, and metadata inspection without storing the file, which makes it useful as a sanity check when a lecture clip looks off. That scan will not replace policy, but it can catch obvious mismatches fast enough to matter when a file is about to be reused.
The weakest version of a recording is the one everyone trusts without checking.
The standard should be simple. If a file is going to travel beyond the immediate class, check that its metadata still makes sense, its audio still matches the visuals, and its timeline has not been broken by a routine edit.
Keep the semester on a schedule
Before the semester starts, verify your capture setup, consent language, storage location, and retention rules. Mid-semester, audit one or two files and make sure the naming, access controls, and edits still match policy. At the end of the term, purge what should be deleted and archive only what the institution actually needs.
Recording lectures in class should feel unremarkable when it is done right. The best system protects students, helps absent learners, and gives the institution a file it can trust years later. The job starts with the first frame and ends with the same discipline you used to capture it.
If your institution is ready to treat classroom capture as a recordkeeping process, not a casual upload, use the next recording as the pilot. Tighten the pre-class check, lock down consent and access, and add a quick authenticity review before reuse. If you want help assessing whether a classroom video is intact, the AI Video Detector team is the right place to start.
